Regging |
|
|
| |
Creating your artwork for regging
The first stage in using regging is to create the artwork you'll use.
Scanning in artwork for regging
You scan in artwork for regging in exactly the same way as any other drawings:
- For more information on scanning line artwork, see Scanning line artwork.
- For more information on scanning backgrounds and overlays, see Scanning backgrounds and overlays.
Tracing lines from a background with the Trace Brush tool
If you're doing a cel-to-background regging, you'll need to create a level with the necessary regging lines traced from the background. (See Backgrounds). For example, let's assume that you have a background of some curtains, and you wish an elephant to appear partly in front of the background, and partly behind it, thus:

To create this effect, we can't easily use a matte, since its shape would need to change as the elephant animates. Using regging is much simpler; we need to draw a regging line that follows the edge of the curtains:
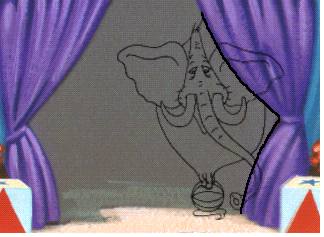
We can then use this line to close off the regions of the elephant that pass behind the curtains.
To trace a regging line from a background, use InkPaint:
- Start the InkPaint application; see Starting applications.
- Choose File > New Traced Level to create a new level to hold the regging line.
- You're prompted to locate the background you wish to trace; see Locating a file.
- If necessary, add the images of any levels involved in the regging by choosing Image > Add Drawing.
- You can now see all the images involved in the regging.
- Use the Trace Brush tool to draw the regging line; see Tracing tools.
- Save the level; see Saving the level.